Recently added to HAR”s free products and services is the zipLogix electronic signature tool called Digital Ink. This product is free to MLS and CIE subscribers. The REALTOR FAQs and step by step guide are below. Feel free to use this material during the transaction process to help you utilize this great new tool. Feel free to download the how to guide below.
REALTOR® FAQs on Digital Signatures
- What is a digital signature?
Houston Association of REALTORS® is proud to present to its member’s, zipLogix® Digital Ink™ electronic signatures! zipLogix® Digital Ink™ is a digital signature solution for signing transactional documents within zipForm®6 , through a “signed, sealed and delivered” online process. Digital Signatures are safe and easy to use. Digital signatures modernize the clients experience and offer’s them a truly paperless electronic process that can be trusted. Digital Ink will definitely save you and your client’s time on printing, faxing, mailing, and meeting to collect signatures.Digital Ink is a green feature that will help lower your cost, reduce time, save gas, and reduce writing errors on your forms. No longer will you need print, fax, mail, or drive around the city to collect signatures. Digital signatures permanently secure the identity of signers and the document’s content. This is a great way to improve your efficiency within your business. - How much does zipLogix® Digital Ink™ cost?
zipLogix® Digital Ink™ is available to REALTOR® members of HAR’s MLS and CIE at no additional cost. This includes unlimited transactions and signers. - If I am a DocuSign® User, how do I switch from DocuSign® to Digital Ink™?
In zipForm®6, go to your Tools tab and select Options. Select the e Sign tab and check the box indicating Digital Ink™as your e Sign provider. - Can I edit the subject and body in my email message to let my clients know that they need to sign?
In zipform®6 you can type in the message body, any additional information or instruction that you want your client to know before your click on Continue to ziplogix®Digital Ink but you zipform®6 will not allow you to edit the subject. Example of subject sent: Your documents are ready to review: zipForm – 1234 Happy St., Happy City, Texas. 77777. Note: When you are in ziplogix®Digital Ink you can click on email and send a separate email to your buyers or sellers, where you can send them a personalized subject header and a message with the link to sign. Please remember to click on Activate, otherwise your clients will not receive the documents to sign. - Can I delete a form when in ziplogix®Digital Ink?
Yes, however you will have to delete the last form added in sequential order. - How do I send documents for digital signature to my clients?
Click the e Sign icon from the File menu toolbar in zipForm®6.
Select Sign; select documents to be signed and the order, then the signers and their order.
Click Continue to zipLogix® Digital Ink to edit the documents.
Click Activate to begin the signing process. Note:It is crucial to always check your documents before sending out for e-signatures. Digital Ink™ is pre-mapped to zipForm®6 documents, however there are fields that may not need to be signed or initialed. - Can you send to two signers at the same time?
No, the first signer must complete the signing process before the second recipient can sign. - How does Identity Verification work?
Identity Verification is an optional additional security measure to verify a signer’s identity. The zipForm®6 user will be charged $5 per signer per transaction and will be prompted to enter credit card information before sending signature. Identity Verification asks the signer a few security questions to confirm their identity. - Where do the questions for the Identity Verification come from?
The information for the identity questions comes from public records, like the county and city. None of the information comes from the signer’s credit record nor affects their credit record. All of the information is in compliance with local and federal privacy laws. - How can I access the documents that my client signed with digital signatures?
You can review the signed documents from your zipForm®6 eSign icon. Select Check Status to access the transaction Dashboard then click View to access the completed documents. - How will a client e-sign a transaction?
The client will receive an email with a customized link in it. The link will direct them to a secure website where they’re required to create a PIN (password) so that they can access the transaction again if necessary and protect their privacy. Clients can access each document needing signatures/initials and navigate to each necessary field using the Tab key. It’s as easy as clicking on the fields to sign/initial the document. - Can I stipulate who can sign the documents first?
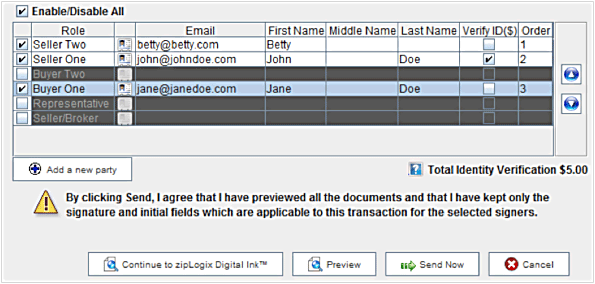
Yes, in the Select Recipients box, select the order of the party’s notification by using the up and down arrow buttons. Disable any recipient that you are not sending the transaction to. You can use Enable/Disable All to select more than one recipient. - Can I upload non-zipForm®6 documents to send to my clients to sign using zipLogix® Digital Ink™?
Yes, use the Continue to zipLogix® Digital Ink button to upload non-zipForm®6 PDFs. Note that locked PDFs are not available to upload at this time. That would be a previously digitally signed document for example. You can only upload PDF’s. - Can I download the files as a single PDF?
Once you or your clients complete signing, you will be able to download/print all the forms as a single PDF, by selecting the form that you want to download/print. - Can you use zipLogix® Digital Ink™ on a mobile device?
You may access your zipForm®6 Professional account on various mobile devices with the zipForm®6 Mobile edition. However zipLogix® Digital Ink is currently not available for use to send a document to zipLogix® Digital Ink to create e-signatures. - Can you sign a document on a mobile device?
The signer and the REALTOR® can sign the document on most mobile devices and tablets that run the Android OS, but not Apple’s iPad or iPhone. Support for iPad and iPhone is expected before year-end. - Can I use zipLogix® Digital Ink™ on my MAC?
Yes, you will need to have Adobe Reader installed and need to use the Safari Internet browser. - What should I do if I sent a document to get signed and the signor has not yet accessed the document?
REALTORS® sending documents using digital signatures should educate and send their clients instructions on how to sign the real estate documents. - What is the difference between zipLogix® Digital Ink™ and DocuSign®?
DocuSign® signed documents have layered signatures in the blank document. Digital Ink™ documents embed the signature into the document, providing a more secure final document. zipLogix® Digital Ink™ is offered to HAR MLS and CIE members at no additional cost and DocuSign® gives HAR members a 20% discount through NAR. Both are incorporated with zipForm®6. Use the service that works best with your business practices. - Why aren’t some signature fields populated for my buyer or seller?
Some of the predefined signing fields are considered “dual role”. These fields can be Buyer or Seller depending on which one is checked within the form. There are two ways to ensure that your buyer or seller sign in all the essential places.
In the parties labeled “Seller 1 or Buyer 1? and “Seller/Buyer 1? enter the contact information in addition to the corresponding Buyer 1 field (vice versa if it’s the Seller). Note: contact information cannot be the same for both fields, so is suggested to use a middle initial for one of the fields when enter contact information.
Go to the Continue to zipLogix® Digital Ink™ section and create a custom signature field for each one that is missing. - What does “Suspend”, “Activate” and “Cancel” mean?
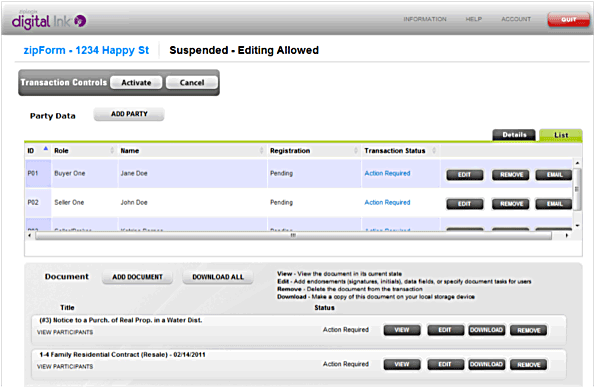
If you click the button Continue to zipLogix® Digital Ink™, your transaction will be automatically suspended until you’ve completed the editing process. None of parties get an invitation to sign your document until you click the Activate button. If at any time you want to stop the next person from receiving the invitation, you can click Suspend. Clicking Cancel will not allow any person to sign and stop the reminder emails to all parties. - Is there an easy way for the signer to see the next unsigned signature/initial field?
Yes, they can use the tab button on their keyboard to automatically be sent to the next unsigned field. Currently, it does not take them to related fields (text, checkbox, date). - How do can I add a Check Box or Text Field?
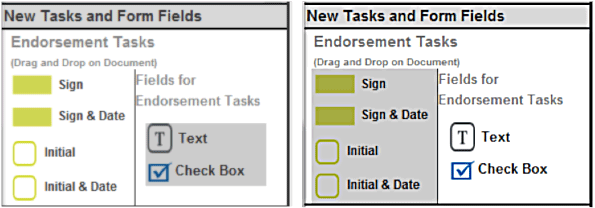
To add a related field such as the text or a check box, under Parties, select the appropriate spot on the form. Drag and drop it there. Please Note:
You cannot add a related Check Box or Text field to initial fields; it must be related to a signature field.A sub-menu in the Form Library will open (note: the text and check box field will no longer be gray) containing Text and Check Box.
Click to drag the related fields to the form on the left in the box.
Click and drag the appropriate field that you wish to use onto the form on the right.
For additional help, please log in to your HAR Member’s Only Portal to take a free webinar or click on www.har.com/edu to sign up for a free one hour MCE course on ziplogix®Digital Ink.
_______________________________________________________________________________________________________
Signing Legal Documents with Digital Signatures
REALTOR® How To’s
- Log into your zipForm®6 account.
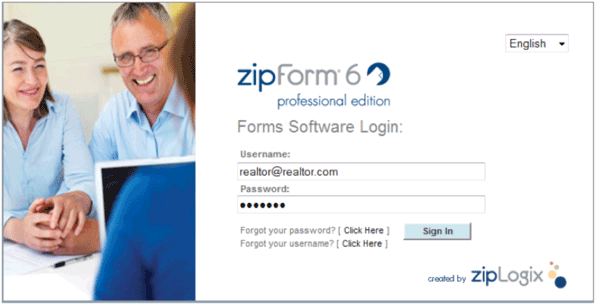
- Open the transaction you want to send for signature.

- Click the e Sign icon on the File tab and click on Sign

- Select the zipForm®6 forms you want to have signed.
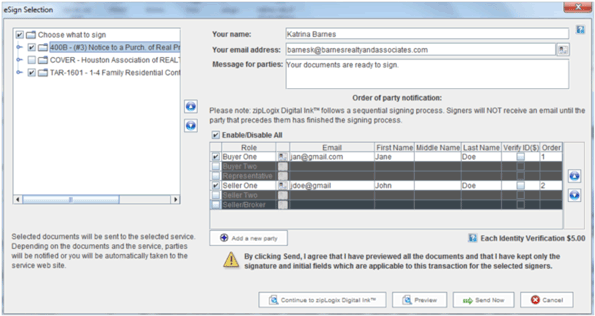
- Select the signers to invite to sign the documents. Please note that all signing roles are enabled by default. You must disable the roles that you do not want included in your email manually.
- Add the signer’s contact information. Email address is required.
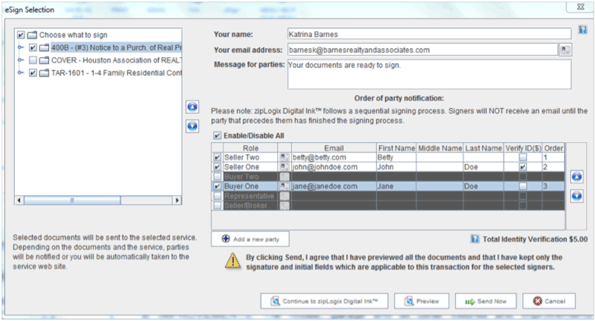
Note: Identity Verification is $5.00 signer. To enable this feature, check the Verify ID ($) box.
Change the order of the signers by highlighting their names and using the arrows to the right. Signing is done is sequential order. - Click the Continue to zipLogix® Digital Ink™ button
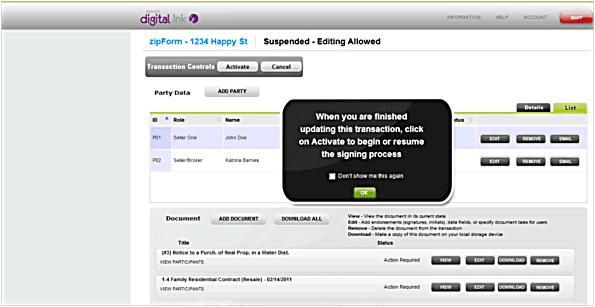
- A new window will open up in zipLogix® Digital Ink™ interface for updating. Click on OK in the box to continue.
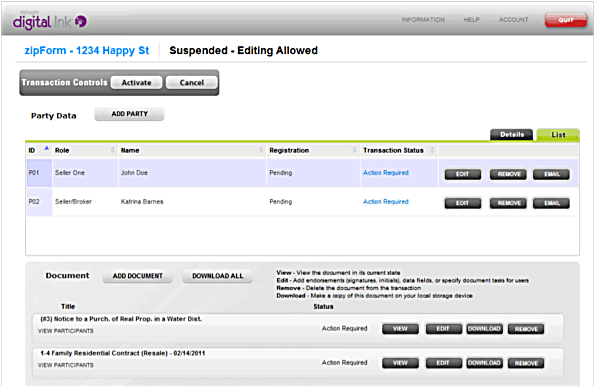
- Click on Add Document button if you want to upload a document from your computer.
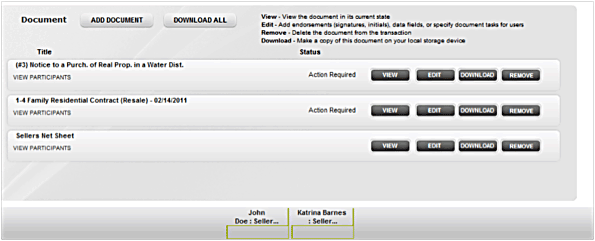
- Name your document & click the Browse button to find the document on your computer.

Click on the Submit button when your document is uploaded. - Click on one of the Edit button to add signatures to the document.
- Highlight the appropriate signer by clicking on their title ( Seller One for example)

- Drag and drop an initial or signature field to the appropriate spot on your form.
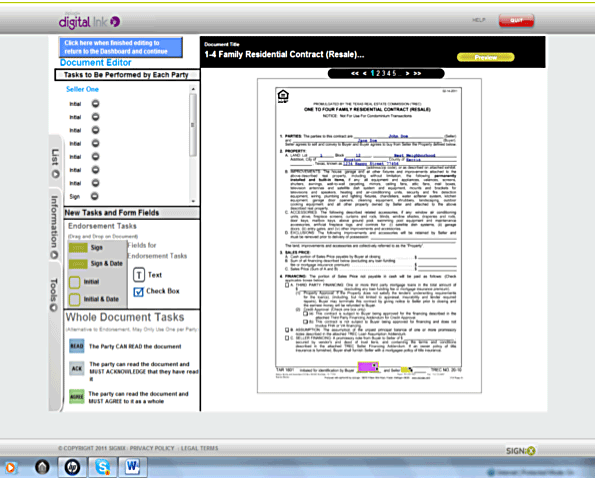
To add a related field such as the date or a check box, under Parties, select the appropriate spot on the form. Drag, drop, and click. A sub-menu in the Form Library will open containing Text and Check Box. Click and drag the text or check box to the appropriate field.
- Click the Preview button located at the top right corner of your screen to view your form with signature tags.

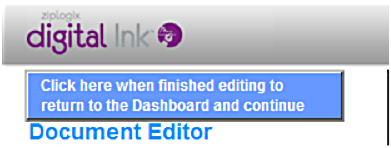
- Go Back to Dashboard by clicking on:
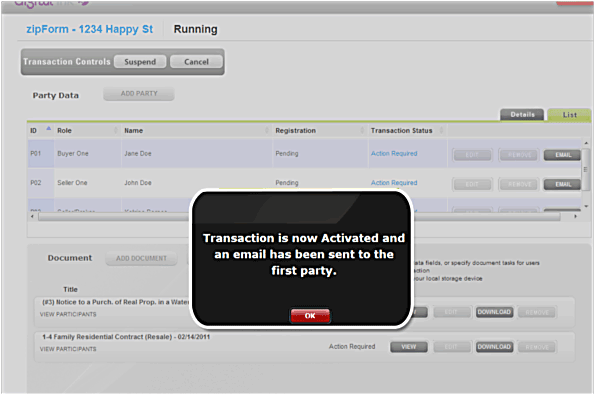
- Click the Activate button to alert your first signer to sign the document via an email invitation.
- Click the Yes button on the activation pop-up.
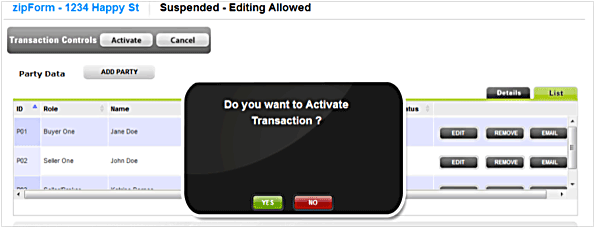
- Click OK. You did it! The invitation will now be sent out to the first signer.
